WARNING: The following repair advice can easily mess up your favorite nib if you aren’t careful and experienced.
You think you’ve found the perfect pen at a show, estate sale or antique store. The color is good. The filling system still works. And then you try to write with it. Although the nib looks good, it is a very scratchy writer.
Learn how to fix a scratchy nib with only a little water and some ultra-fine grit sandpaper.
You can fix that scratchy nib with some patience and nerves of steel.
It doesn’t take much effort to ruin or at least alter the width of your nib with the accidental flick of the wrist. DO NOT try this on your favorite pen that has just picked up a hint of a scratch. Get some junkers with which you can build up some experience.
Get to know your nib before you attempt anything. Is it gold? Is it tipped with irridium? Is it a steel nib? Look very closely at the nib. Use a loupe or magnifying glass. Are the tines even? Is the tip bent?
If the tines are slightly misaligned, you can push them back into place with just your thumb nail. Be careful, as misaligned tines often snap very easily. Often, I prefer to raise the lower tine to be even with the upper tine. To do this, push directly up on the single lower tine with your thumb nail to a position just above the other tine. Hold it for a second and then relax it. Check it, and repeat the process as needed. Sometimes, I push the upper tine down. Learning which to redirect really just comes with experience.
If the tip is bent, forget about it. We’ll save that for a different article.
If the tines are even but just scratchy…
Check to see if the tip is gold, gold with a metal (usually irridium) tip or steel. If it is plain gold, which is rare, the sanding process will weardown the nib super quickly. If it is tipped, check to see if the tipping material is still complete. If it isn’t, you’ll need to get it retipped. If the tipping metal is still there, then you will be safer to try to sand the nib into submission. The steel nibs are also pretty safe to try to smooth, although by their nature, they generally won’t smooth as well as the gold nibs. It is rare to find a truely smooth steel nib on a vintage pen, unless it is from the Esterbrook 9000s line.
If you are into freakishly extra-fine nibs, send your pen to a nib expert (and I am not that type of nib expert). If you aren’t so picky as long as you can have a smooth writer…continue reading.
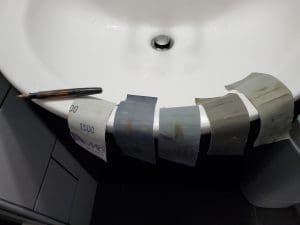
To try to sand the nib into a sweet spot, you will need a small glass of water, a clean sheet of your normal writing paper and some very fine-grit sandpaper. I recommend 2500 grit or finer. You also will want a tissue or paper towel.
Set up on a hard-topped desk or table. A cushioned writing surface will have you putting holes in the sandpaper with the nib and putting odd edges on the nib.
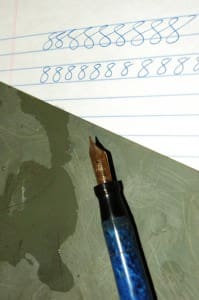
To get started, I like to make sure the pen is full. Then spread a little water on the sandpaper. Next write a figure 8 with the scratchy pen on the watered sandpaper. The water helps to lubricate the sandpaper so that you don’t take off too much from the nib. Your figure 8 should be about the size of your normal letters when writing…maybe a little bigger. Don’t worry about the ink on the sandpaper. And don’t think that the ink will naturally lube the paper enough without water. It won’t.
I like to have the pen full of ink, so I can immediately test the nib on a clean sheet of paper. After your first figure 8, shake the pen in the glass of water and dry off the tip. This just clears the tip of any sand, as you don’t want to keep sanding the nib when you don’t want to sand it. Test the nib on the clean sheet of paper and see how it feels. Patiently repeat one or two 8’s at a time on the sandpaper and repeat the process.
If you find that you need more than a couple figure 8’s, start writing 8’s from different angles, as you don’t want to flatten out the nib in your normal writing position.
If everything is almost perfect but you are still having scratches at the top or bottom of your loops, try to work out those parts of the letter on the sandpaper.
REMEMBER, every time that nib touches the sandpaper, it is going to get wider. Often, it only takes an 8 or two. It is not uncommon for your fine nib to become a medium or a medium a bold nib while trying this repair. If you want to be assured perfection with little change to your nib’s writing characteristics, it is best to find an expert.